What's this Article About?
Farcaster Frame has changed the way we interact with posts in decentralized social apps. Have you ever pondered the inner workings of minting an NFT through a frame and considered how you could build a frame capable of doing so? In this article, we’ll create a Frame that allows users with a verified Solana address to mint a compressed NFT (cNFT). You can try the demo here. Don't forget to recast it and like it!
What's a Farcaster Frame? 🤔
Farcaster is a sufficiently decentralized social network built on Ethereum. It is a public social network similar to Twitter and Reddit. Users can create profiles, post "casts" and follow others. They own their accounts and relationships with other users and are free to move between different apps. A key innovation within Farcaster is the introduction of frames — turning regular social media posts into fully-fledged applications — to enrich social experiences online.
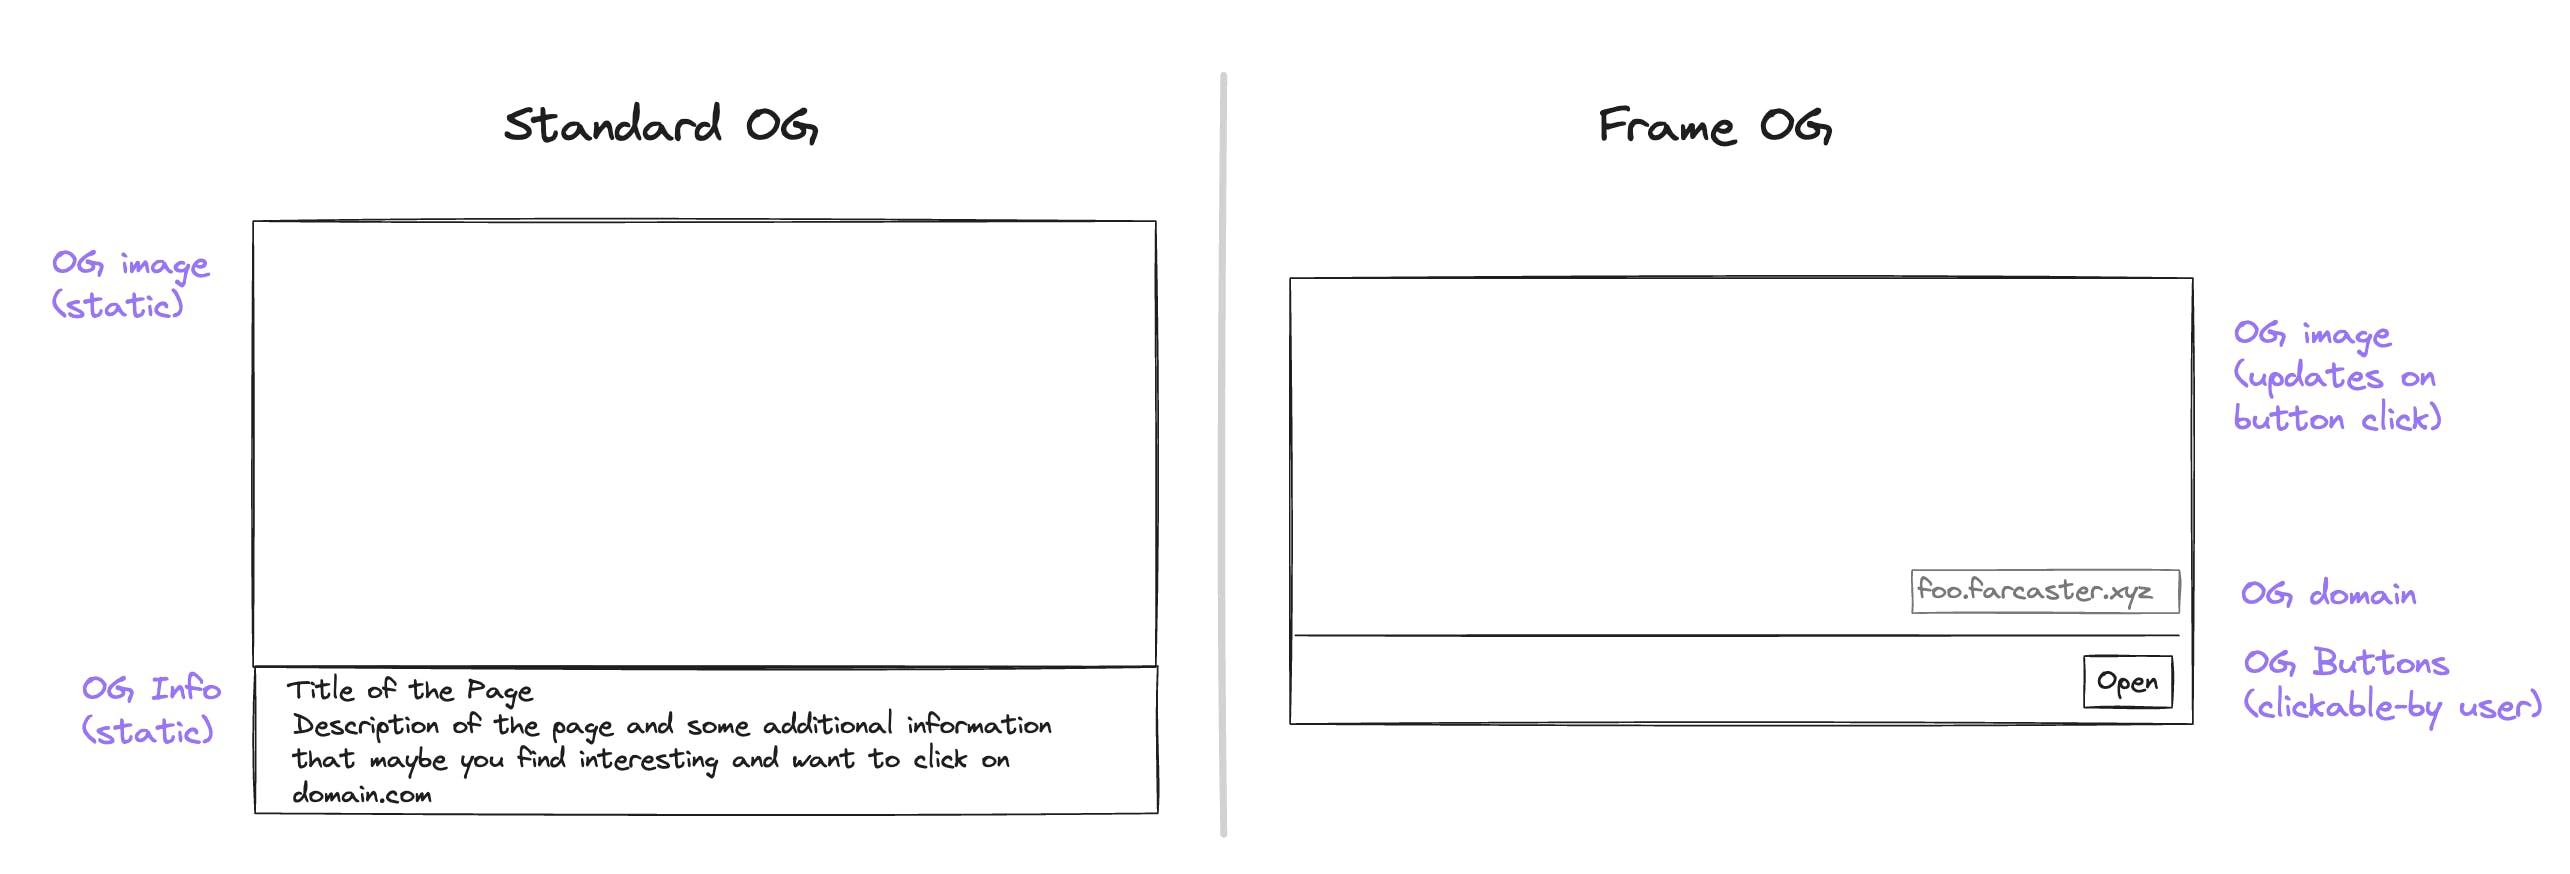
Frame is a standard for creating interactive and authenticated experiences on Farcaster. Create polls, live feeds, or interactive galleries inside Warpcast or any other FC client. Frames extend the OpenGraph standard and turn static embeds into interactive experiences. The diagram below shows the difference between a standard OG and a Frame OG inside Warpcast.
Tutorial: Creating a frame that mints cNFT 🧩
We’ll create the project using a Next.js template. We’ll use Coinbase’sOnchainKit, specifically the Frame Kit, to fetch a Farcaster user’s information and handle Frame response easily. Then, we’ll feed this data into the Underdog Protocol API to mint the cNFT to a user’s Solana wallet. Head over to Underdog, create a project, and get projectId

Generate an API key from the developer section

Create a batch of cNFTs using Underdog API Endpoint
We will create a batch of cNFTs using the metadata of this format.
import metadata from "./metadata.json";

async function main() {
  const options = {
    method: "POST",
    headers: {
      accept: "application/json",
      "content-type": "application/json",
      authorization: "YOUR UNDERDOG API KEY",
    },
    body: JSON.stringify(metadata),
  };
  const projectId = "YOUR UNDERDOG PROJECT ID"
  fetch(`https://devnet.underdogprotocol.com/v2/projects/${projectId}/nfts/batch`, options)
    .then((response) => response.json())
    .then((response) => console.log(response))
    .catch((err) => console.error(err));
}

main();
Setup Upstash Redis
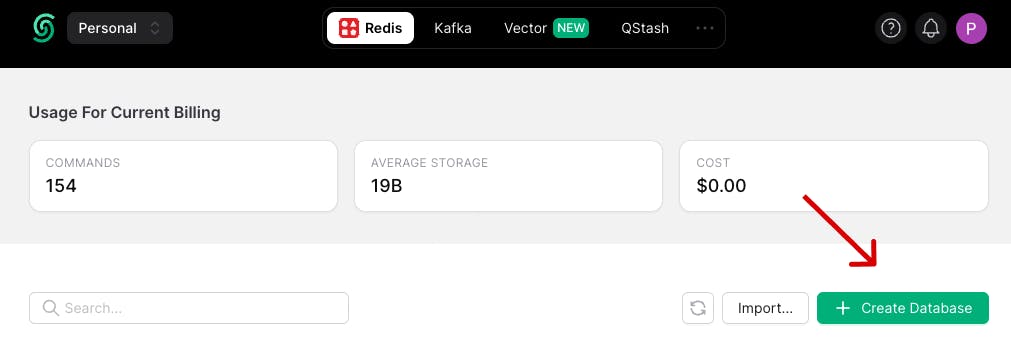
Suppose we have created a batch of 100 NFTs and nftId starts from 1. We need to provide nftId in the endpoint URL whenever a user mints cNFT. After a successful mint, we need to increment the nftId. Redis is the most efficient approach to handle this. Create your account at Upstash and create a database in your preferred region and cloud provider.

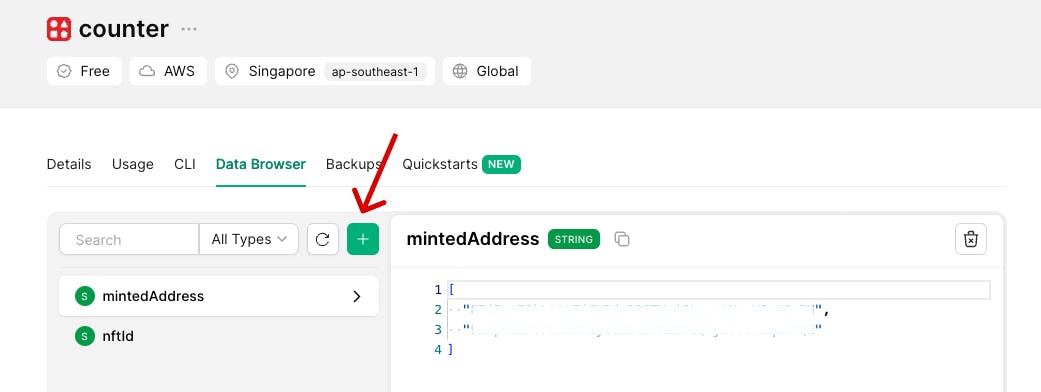
After creating database, create two variables in Data Browser section: nftId and mintedAddress . Datatype should be string and list respectively. Initial value of nftId: 1 and mintedAddress: [ ] (empty list).

Create a new Next.js App
Run the following command to create the next app. Make sure to select App router:
npx create-next-app cnft-frame
cd cnft-frame
Install the dependencies that we will require:
yarn install @coinbase/onchainkit @upstash/redis
#or
pnpm install @coinbase/onchainkit @upstash/redis
Let's build a frame
Go to page.tsx and replace the code with the following:
import { FrameMetadata } from "@coinbase/onchainkit";

export default function Home() {
  return (
    <FrameMetadata
      buttons={[
        {
          label: "Mint",
          action: "post",
        },
      ]}
      image={{
        src: `${process.env.HOST_URL}/cnft.png`,
        aspectRatio: "1:1",
      }}
      postUrl={`${process.env.HOST_URL}/mint`}
    />
  );
}
Here, we are creating the FrameMetadata which contains the buttons, image, and postUrl. The mint button creates an API request to the /mint endpoint mentioned in postUrl. The image cnft.png will appear in the frame. You can replace this with your NFT image.
Create an endpoint for handling mint
Make a folder 'mint' in the app directory and create a file route.ts in app/mint. Add the following code:
import {
  FrameRequest,
  getFrameHtmlResponse,
  getFrameMessage,
} from "@coinbase/onchainkit/frame";
import { NextRequest, NextResponse } from "next/server";
import { Redis } from "@upstash/redis";

async function getResponse(req: NextRequest): Promise<NextResponse> {
  const redis = new Redis({
    url: process.env.REDIS_URL!,
    token: process.env.REDIS_KEY!,
  });
  const nftId = (await redis.get("nftId")) as number;
  const body: FrameRequest = await req.json();
  const { isValid, message } = await getFrameMessage(body, {
    neynarApiKey: "NEYNAR_ONCHAIN_KIT",
  });

  // Verify that request received from the Frame is valid
  if (!isValid) {
    return new NextResponse("Invalid Frame Request", { status: 400 });
  }

  // Get the verified solana address of the user
  const address = message?.interactor?.verified_addresses?.sol_addresses?.[0];

  // If the user has not verified the address, redirect them to the verify the address
  if (!address) {
    return new NextResponse(
      getFrameHtmlResponse({
        ogTitle: "No address found",
        buttons: [
          {
            label: "Connect your SOL wallet",
            action: "link",
            target: `https://verify.warpcast.com/verify/${message?.interactor?.fid}?redirect=https%3A%2F%2Fwarpcast.com%2F%7E%2Fsettings%2Fverifed-addresses&network=solana`,
          },
        ],
        image: `${process.env.HOST_URL}/not-found.png`,
      })
    );
  }

  // Using Underdog Protocol endpoint to mint the cNFT
  const bearer = process.env.UNDERDOG_API_KEY!;
  const UNDERDOG_URL = `https://devnet.underdogprotocol.com/v2/projects/${process.env.PROJECT_ID}/nfts/${nftId}/transfer`;
  const OPTIONS = {
    method: "POST",
    headers: {
      accept: "application/json",
      "content-type": "application/json",
      authorization: bearer,
    },
    body: JSON.stringify({ receiverAddress: address }),
  };

  const response = await fetch(UNDERDOG_URL, OPTIONS).then((response) =>
    response.json()
  );

  /* If the minting fails, show the error message and a button to try again
    else show the success message and a button to view the cNFT on Explorer */
  if (response.code) {
    return new NextResponse(
      getFrameHtmlResponse({
        ogTitle: "Mint Error",
        buttons: [
          {
            label: "Minting error! Try again",
            action: "post",
          },
        ],
        image: `${process.env.HOST_URL}/error.png`,
        postUrl: `${process.env.HOST_URL}`,
      })
    );
  } else {
    await redis.set("nftId", nftId + 1);
    return new NextResponse(
      getFrameHtmlResponse({
        ogTitle: "Minted",
        buttons: [
          {
            label: "View your cNFT",
            action: "link",
            target: `https://solscan.io/account/${address}?cluster=devnet#portfolio`,
          },
        ],
        image: `${process.env.HOST_URL}/success.png`,
      })
    );
  }
}

export async function POST(req: NextRequest): Promise<Response> {
  return getResponse(req);
}
Let's understand what we are doing in this big chunk:
We created a function
getResponseto handle the request efficiently. First, we set up a Redis instance to get the latest nftId and increment it later.The
getFrameMessagehelps to validate the request and fetch interactor details from the message.If the interactor has verified Solana's address then it hits the Underdog endpoint and according to the response, it will return the
FrameHtmlResponse
Add validations on mint (e.g liked or one-time mint)
We can put certain validation on the user for minting cNFT first like and recast the post. To do so, simply add the following code after we verify the request is valid in the same file route.ts
// Check if the user has liked and recasted the cast
  if (!message?.liked && !message?.recasted) {
    return new NextResponse(
      getFrameHtmlResponse({
        ogTitle: "Engage with cast",
        buttons: [
          {
            label: "Like & Recast!!",
            action: "post",
          },
        ],
        image: `${process.env.HOST_URL}/invalid.png`,
        postUrl: `${process.env.HOST_URL}`,
      })
    );
  }
You can also add limitations on user to allow mint cNFT once per wallet address. Add the following snippet after we validate existing verified address in route.ts
// Check if the user has already minted a cNFT
  const mintedAddress = (await redis.get("mintedAddress")) as string[];
  const isMinted = mintedAddress.includes(address);
  if (isMinted) {
    return new NextResponse(
      getFrameHtmlResponse({
        ogTitle: "Already minted",
        buttons: [
          {
            label: "View your cNFT",
            action: "link",
            target: `https://xray.helius.xyz/account/${address}/assets?network=devnet`,
          },
        ],
        image: `${process.env.HOST_URL}/minted.png`,
      })
    );
  }
Don't forget to add the address in the database after successful mint so the user can't mint again. Edit the else statement of success mint response
else {
    await redis.set("nftId", nftId + 1);
    await redis.set("mintedAddress", [...mintedAddress, address]);
  //  return new NextResponse(         ADD_ABOVE_HERE
  //    getFrameHtmlResponse({
  //       ...
Final output ⛳️
Your mint/route.ts should look like the following code. If you need any assistance, feel free to check my repository.
/* This is the route file which cooks the response for the mint button.
   Make sure to paste the env variables before deploying the app. */
import {
  FrameRequest,
  getFrameHtmlResponse,
  getFrameMessage,
} from "@coinbase/onchainkit/frame";
import { NextRequest, NextResponse } from "next/server";
import { Redis } from "@upstash/redis";

async function getResponse(req: NextRequest): Promise<NextResponse> {
  const redis = new Redis({
    url: process.env.REDIS_URL!,
    token: process.env.REDIS_KEY!,
  });
  const nftId = (await redis.get("nftId")) as number;
  const mintedAddress = (await redis.get("mintedAddress")) as string[];
  const body: FrameRequest = await req.json();
  const { isValid, message } = await getFrameMessage(body, {
    neynarApiKey: "NEYNAR_ONCHAIN_KIT",
  });

  // Verify that request received from the Frame is valid
  if (!isValid) {
    return new NextResponse("Invalid Frame Request", { status: 400 });
  }

  // Check if the user has liked and recasted the cast
  if (!message?.liked && !message?.recasted) {
    return new NextResponse(
      getFrameHtmlResponse({
        ogTitle: "Engage with cast",
        buttons: [
          {
            label: "Like & Recast!!",
            action: "post",
          },
        ],
        image: `${process.env.HOST_URL}/invalid.png`,
        postUrl: `${process.env.HOST_URL}`,
      })
    );
  }

  // Check if all the cNFTs are claimed
  if (nftId === 1000) {
    return new NextResponse(
      getFrameHtmlResponse({
        ogTitle: "Sold out",
        buttons: [
          {
            label: "Follow me",
            action: "link",
            target: "https://warpcast.com/neelpatel",
          },
        ],
        image: `${process.env.HOST_URL}/not-available.png`,
      })
    );
  }

  // Get the verified solana address of the user
  const address = message?.interactor?.verified_addresses?.sol_addresses?.[0];

  // If the user has not verified the address, redirect them to the verify the address
  if (!address) {
    return new NextResponse(
      getFrameHtmlResponse({
        ogTitle: "No address found",
        buttons: [
          {
            label: "Connect your SOL wallet",
            action: "link",
            target: `https://verify.warpcast.com/verify/${message?.interactor?.fid}?redirect=https%3A%2F%2Fwarpcast.com%2F%7E%2Fsettings%2Fverifed-addresses&network=solana`,
          },
        ],
        image: `${process.env.HOST_URL}/not-found.png`,
      })
    );
  }

  // Check if the user has already minted a cNFT
  const isMinted = mintedAddress.includes(address);
  if (isMinted) {
    return new NextResponse(
      getFrameHtmlResponse({
        ogTitle: "Already minted",
        buttons: [
          {
            label: "View your cNFT",
            action: "link",
            target: `https://xray.helius.xyz/account/${address}/assets?network=devnet`,
          },
        ],
        image: `${process.env.HOST_URL}/minted.png`,
      })
    );
  }

  // Using Underdog Protocol endpoint to mint the cNFT
  const bearer = process.env.UNDERDOG_API_KEY!;
  const UNDERDOG_URL = `https://devnet.underdogprotocol.com/v2/projects/${process.env.PROJECT_ID}/nfts/${nftId}/transfer`;
  const OPTIONS = {
    method: "POST",
    headers: {
      accept: "application/json",
      "content-type": "application/json",
      authorization: bearer,
    },
    body: JSON.stringify({ receiverAddress: address }),
  };

  const response = await fetch(UNDERDOG_URL, OPTIONS).then((response) =>
    response.json()
  );

  /* If the minting fails, show the error message and a button to try again
    else show the success message and a button to view the cNFT on Explorer */
  if (response.code) {
    return new NextResponse(
      getFrameHtmlResponse({
        ogTitle: "Mint Error",
        buttons: [
          {
            label: "Minting error! Try again",
            action: "post",
          },
        ],
        image: `${process.env.HOST_URL}/error.png`,
        postUrl: `${process.env.HOST_URL}`,
      })
    );
  } else {
    await redis.set("nftId", nftId + 1);
    await redis.set("mintedAddress", [...mintedAddress, address]);
    return new NextResponse(
      getFrameHtmlResponse({
        ogTitle: "Minted",
        buttons: [
          {
            label: "View your cNFT",
            action: "link",
            target: `https://xray.helius.xyz/account/${address}/assets?network=devnet`,
          },
        ],
        image: `${process.env.HOST_URL}/success.png`,
      })
    );
  }
}

export async function POST(req: NextRequest): Promise<Response> {
  return getResponse(req);
}
Deploy it on Vercel 🚀
We're almost there. Push the code to the GitHub Repository. Head over to Vercel and import your project. Add your env variables and deploy the project. The env variables should include:
HOST_URL: It should be your Vercel deployed link of the project. No worries you can add it later and redeploy it.
UNDERDOG_API_KEY: The bearer token which you can get from the developer dashboard.
PROJECT_ID: The project you created at Underdog Protocol has a unique ID.
REDIS_KEY: You can get it from the REST API section of the database dashboard on Upstash. Just unhide it.
REDIS_URL: You can get it from the REST API section of the database dashboard on Upstash.
Treat yourself to a cupcake🧁! You're the Farcaster Frame Builder🫡
How to test frame? 🛠️
You can test your frame on Frames Validator. You can cast it and test it live to avoid any limitations.
Conclusion 🧙🏻♂️
Thank you for reading this article so far! We learned the steps of creating a batch of cNFTs using Underdog Protocol as well as building a frame that facilitates minting a cNFT directly to the interactor's Solana verified address. Additionally, we explored the integration of pre-mint checks as part of the minting process. You can add more to this. Feel free to ask me any doubts!

